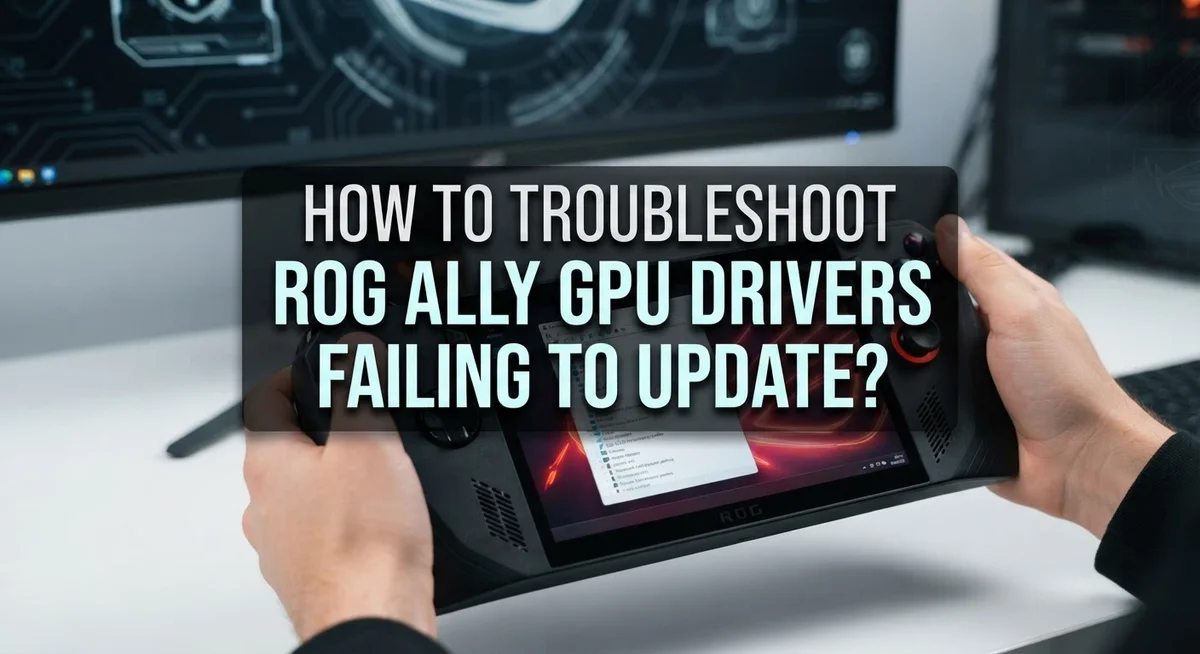
How To Troubleshoot ROG Ally GPU Drivers Failing To Update?
Getting your ROG Ally GPU drivers to update can feel frustrating when the process keeps failing. You click update, wait, and then nothing works as expected.
The good news is that this is a very common problem with a clear fix. Most driver update failures on the ROG Ally happen because old driver files are still sitting on your system. These leftover files block the new installation from completing properly.
This article walks you through exactly how to fix this. You will learn why driver updates fail in the first place, and what steps actually solve the problem.
By the end, your AMD Radeon graphics driver should be updated and running smoothly on your ROG Ally.
In a Nutshell
ROG Ally GPU driver updates fail most often because old driver files are still sitting on your system and blocking the new installation.
The fix starts with a complete uninstall of your current AMD Radeon driver before you try installing anything new.
After uninstalling, check for leftover driver files and remove them so nothing interferes with the fresh install.
You can manually update the driver by right-clicking AMD Radeon Graphics in Device Manager and browsing to the C:\ drive for the new files.
Always perform a clean install rather than updating over an existing driver. This gives you the best chance of success.
If your antivirus software is running during installation, it may block the process. Temporarily disabling it can help the install go through without issues.
Why ROG Ally GPU Driver Updates Fail in the First Place
Your ROG Ally GPU driver updates fail because old driver files remain on your system. These leftover files block the installation of new drivers. Think of it like trying to install new software when the old version is still partially there. The system gets confused and stops the process.
Residual driver files are the main culprit. When you uninstall a driver, some files often stay behind in hidden folders. These remnants prevent a clean installation of the updated driver version. Your system cannot overwrite them properly, so the update fails.
Another reason updates fail is attempting to install new drivers over existing ones. This creates conflicts. The installer cannot replace active driver components while they are in use. Your graphics card keeps using the old driver, preventing the new one from taking over.
Antivirus software can also block driver installations. Some security programs flag driver files as suspicious and prevent them from running. This stops the update process before it completes.
Automatic driver detection sometimes misses updates too. Your system might not find the latest driver version even when one is available. Manual checking is more reliable than waiting for automatic notifications.
Windows registry entries from old drivers can cause problems as well. These entries tell your system to use outdated driver configurations. New drivers conflict with these old settings.
Finally, incorrect installation paths cause failures. If you do not browse to the correct location where new drivers are stored, the installer cannot find the files. The update process stops because it cannot locate what it needs to install.
Understanding these causes helps you prevent update failures and fix them when they occur.
How To Check Your Current AMD GPU Driver Version on ROG Ally
Checking your current AMD GPU driver version on your ROG Ally is straightforward. This step helps you understand what version you have before attempting an update.
Start by right clicking on your desktop. Look for an option that says AMD Radeon Graphics or AMD Radeon Settings. Click on that option to open the AMD control panel.
Once the AMD control panel opens, look for a menu option labeled System or Information. This section displays your current driver version number. Write down this version so you can compare it later with the newest available version.
You can also check your driver version through Device Manager. Press the Windows key and type Device Manager, then press Enter. Expand the Display adapters section by clicking the arrow next to it.
Right click on AMD Radeon Graphics in that list. Select Properties from the menu. Click on the Driver tab at the top of the window. You will see your current driver version displayed here along with the driver date.
Another quick way is to visit the AMD support website directly. You can enter your GPU model and see what the latest driver version should be. This helps you determine if an update is actually available for your system.
Write down both your current version and the latest available version. This information becomes important when troubleshooting failed updates. Knowing your versions helps you verify that the update actually completed successfully.
Take a screenshot of your current driver version for your records. This creates a reference point if something goes wrong during the update process. Having this documentation makes troubleshooting much easier and faster.
How To Completely Uninstall Old GPU Drivers Before Updating
Completely removing old GPU drivers is the critical first step to fixing update failures on your ROG Ally. Old driver files act as blockers that prevent new installations from completing successfully.
Start by accessing Device Manager. Right click on your Windows Start button and select Device Manager from the menu. Locate AMD Radeon Graphics in the list of devices. Right click on it and choose Uninstall device.
A dialog box will appear with an option to delete the driver software. Check this box before proceeding. This step removes the driver files from your system completely. Click Uninstall to finish the process.
After uninstalling, restart your ROG Ally. This restart allows Windows to clear any remaining driver processes from memory and helps the system prepare for a fresh installation.
Once your device restarts, manually search for leftover driver files. Open File Explorer and navigate to your C:\ drive. Look in these locations: Program Files, Program Files (x86), and AppData folders. Search specifically for AMD or Radeon related folders and delete them.
Check your Windows registry for old driver entries as well. Press Windows key plus R, type regedit, and search for any AMD or Radeon entries. Delete these entries carefully to prevent system issues.
Disable your antivirus software temporarily during this process. Security programs sometimes block driver removal or installation steps. Turn protection back on after completing the uninstall.
Finally, restart your ROG Ally one more time before attempting to install the new driver. This ensures your system is in a clean state and ready to accept the updated driver without conflicts.
How To Perform a Clean GPU Driver Installation on ROG Ally
A clean GPU driver installation removes all traces of old software before adding new drivers. This process prevents conflicts that cause update failures on your ROG Ally.
Start by opening Device Manager. Right click your Windows Start button and select Device Manager. Find AMD Radeon Graphics in the list. Right click it and choose Uninstall device. Check the box that says Delete the driver software for this device. This step removes core driver files from your system.
After uninstalling, restart your ROG Ally completely. This allows Windows to clear temporary files and registry entries. Don’t skip this restart because leftover files can interfere with your clean installation.
Once your device restarts, open File Explorer and navigate to your C:\ drive. Look for folders named AMD, ATI, or Radeon. Delete any folders you find. Check your Program Files and Program Files (x86) directories too. Search for any remaining AMD driver files and remove them completely.
Next, disable your antivirus software temporarily. Security programs sometimes block driver installations. Turn off your antivirus, then proceed with the new installation.
Right click your desktop and select AMD Radeon Graphics. Choose the option to update your driver. Select Browse my computer for drivers. Navigate to your C:\ drive where you saved the new driver files. Follow the installation prompts carefully.
After installation completes, restart your ROG Ally again. This final restart ensures all new driver components load properly. Re enable your antivirus software once your device starts up.
This clean installation method removes conflicts and gives your new drivers a fresh start. Your ROG Ally should now recognize and use the updated GPU drivers without errors.
How To Manually Browse and Install Drivers From the C:\ Drive
When your ROG Ally driver updates fail, manually browsing and installing from your C:\ drive often solves the problem. This method gives you direct control over which driver files your system uses.
Start by opening File Explorer on your ROG Ally. Navigate to your C:\ drive and create a new folder called “GPU Drivers” or similar. This folder will store your downloaded driver files in one organized location.
Next, visit the AMD support website from another computer or device. Download the latest GPU driver package for your ROG Ally’s specific graphics card. Save this file to your newly created folder on the C:\ drive. Make sure you download the correct version for your system architecture.
Now open Device Manager by right clicking your Windows Start button. Locate AMD Radeon Graphics in the display adapters section. Right click on it and select “Update driver” from the menu.
A dialog box will appear with two options. Choose “Browse my computer for drivers” instead of the automatic search option. This gives you manual control over the installation process.
Click “Browse” and navigate to your C:\ drive folder where you saved the driver files. Select the folder and click “Next.” Windows will scan this location and identify the correct driver files.
The installation process begins automatically. Let it complete without interrupting. Once finished, restart your ROG Ally to apply all changes.
This manual method bypasses automatic detection issues that often cause update failures. You maintain complete visibility over which files your system installs. If problems persist after restart, check your C:\ drive for any leftover driver remnants from previous installations.
How Antivirus Software Can Block Driver Updates and What To Do
Antivirus software can unexpectedly block your ROG Ally GPU driver updates. Your security program sees the driver installation process as a potential threat and stops it from completing.
Why this happens is straightforward. Antivirus programs monitor file changes and system modifications. Driver updates involve deep system access, which triggers security alerts. Your antivirus then quarantines or blocks the installation files before they reach your graphics card.
Common security software that causes these blocks includes Avast, Norton, McAfee, and Windows Defender. Each program has different sensitivity levels. Some are more aggressive about stopping driver installations than others.
The solution is simple but requires caution. Temporarily disable your antivirus software before attempting your GPU driver update. This removes the security barrier preventing installation. Make sure you disable it completely, not just pause it. Some programs keep background protection running even when paused.
Here’s the process. Open your antivirus program settings. Look for options like “Disable” or “Turn Off.” Select the option and confirm any prompts. Your system will show a notification that protection is disabled.
After disabling antivirus protection, proceed with your driver update immediately. Don’t wait. Install the drivers while protection remains off. Once installation finishes successfully, restart your ROG Ally.
After restarting, reactivate your antivirus software right away. Open the program and select “Enable” or “Turn On.” Your system should show protection is active again.
If your antivirus continues blocking driver updates even after disabling it, consider adding the driver folder to your security software’s exclusion list. This tells your antivirus to trust that specific location. Check your antivirus settings for an “Exclusions” or “Whitelist” option to accomplish this.
Common Mistakes To Avoid When Updating ROG Ally GPU Drivers
Many people make critical errors when updating ROG Ally GPU drivers. Understanding these mistakes helps you avoid frustrating failures and keep your device running smoothly.
The biggest mistake is installing new drivers without removing the old ones first. Old driver files remain on your system even after updates appear complete. These leftover files create conflicts and block fresh installations. Always perform a complete uninstall before installing any new version.
Skipping the clean uninstall process is another common error. Simply clicking “update” through Device Manager leaves residual files behind. These hidden files sit on your C:\ drive and interfere with new driver functionality. A proper uninstall removes everything, giving your system a fresh foundation.
Many users ignore residual files after uninstallation. After you uninstall drivers, check your C:\ drive manually for remaining driver folders. Delete any leftover files you find. This step takes just minutes but prevents major installation problems later.
Relying solely on automatic driver detection causes failures too. Your ROG Ally may miss available updates or detect outdated versions. Manually checking for updates ensures you get the latest driver files. Visit the AMD support website directly and download the correct version for your device.
Not disabling antivirus software during installation leads to blocked updates. Security programs sometimes flag driver installations as suspicious activity. Temporarily turn off your antivirus before updating, then reactivate it immediately afterward.
Finally, avoid restarting your device mid installation. Interrupting the process corrupts files and requires starting over. Let installations complete fully before touching anything.
These mistakes are easily preventable. Take time to follow proper uninstall procedures, check for residual files, and disable security software temporarily. Your driver updates will succeed consistently when you avoid these common pitfalls.
How To Verify the Driver Update Was Successful
After you install new GPU drivers on your ROG Ally, you need to verify the update actually worked. This step prevents you from thinking the installation succeeded when problems still exist.
Start by checking Device Manager. Right click your Windows Start button and select Device Manager. Look for AMD Radeon Graphics in the display adapters section. Click the arrow next to it to expand the entry. If you see a yellow exclamation mark or warning symbol, the driver did not install correctly.
Next, note the driver version number. Right click AMD Radeon Graphics and select Properties. Click the Driver tab at the top. You will see the driver version and date listed here. Compare this information with the version you just installed. They should match exactly.
Run a quick system restart to finalize the installation. After your ROG Ally restarts, return to Device Manager and check the driver version again. The numbers should remain the same and show no error symbols.
Test your GPU performance by opening a graphics intensive application. This could be a video game or 3D software. If the program runs smoothly without crashes, your driver update was successful.
Check for error messages in Device Manager one more time. No warnings or yellow marks means your installation is complete.
If you still see mismatched version numbers or warning symbols, the update failed. Return to your uninstall process and perform a complete clean removal of all driver files. Then reinstall the drivers using the manual C:\ drive method to ensure proper installation.
Final Thoughts
Fixing ROG Ally GPU driver failures is a straightforward process once you understand the root cause.
Old driver remnants are almost always the problem. They block new installations and cause errors that seem confusing at first.
The fix starts with a complete and clean uninstall of your existing drivers. Never install new drivers on top of old ones.
Always remove leftover files after uninstallation. These residual files are small but can completely stop a fresh driver installation from working.
Manually checking for driver updates gives you more control than relying on automatic detection. Automatic tools often miss updates or fail silently.
When browsing for drivers, always verify the correct path on your C:\ drive. A wrong path during installation causes failures that look like driver errors.
Antivirus software is a silent disruptor. Temporarily disable it before starting any driver installation on your ROG Ally.
Restart your device after every successful installation. This finalizes the changes and ensures your GPU recognizes the new driver correctly.
Always confirm the update worked by checking Device Manager. A matching driver version number confirms the installation was successful.
If something goes wrong, repeat the process from scratch. Do not try to patch a failed installation.
Patience and order matter here. Rushing through steps or skipping the clean install process will waste your time.
Every step in this process builds on the last. Skipping even one step can bring you back to the same failure point.
Follow the correct sequence every time, and your ROG Ally GPU drivers will update without issue. Consistency is what makes the difference.
Frequently Asked Questions
What causes GPU driver update failures on ROG Ally?
Driver update failures happen when old driver files remain on your system. These leftover files block the new installation from completing. Your system gets confused because both old and new drivers try to run at the same time. This conflict creates errors and stops the update process.
How do I perform a clean driver uninstall?
Go to Control Panel and find Programs and Features. Locate your AMD graphics driver and select Uninstall. After uninstallation completes, restart your device. Then manually search your C:\ drive for any remaining driver folders. Delete these leftover files before installing the new driver version.
Why does my antivirus software interfere with driver updates?
Security software sometimes blocks driver installation files because they look suspicious. Your antivirus sees the installation process as a potential threat. Temporarily disable your security software before installing new drivers. Remember to turn it back on after the installation finishes successfully.
Should I use automatic or manual driver detection?
Manual detection gives you better control over the update process. You can verify the driver version before installation begins. Automatic detection sometimes misses available updates or installs incompatible versions. Visit the AMD support website and search for your specific device model to find the correct driver file.
What should I do if the update still fails after a clean uninstall?
Check Device Manager for any warning symbols next to your graphics device. Try installing from a different USB port or storage location. Disable any background applications running on your system. If problems continue, perform a system restart and attempt the installation again in Safe Mode.

Hi, I’m Simmy — the creator and writer behind ScaleMyPic.com. I’m a tech enthusiast who loves breaking down complex products into simple, honest reviews and guides. My goal? To help you make smarter tech decisions without the confusion. Got a question? Feel free to reach out!