How To Fix Thermal Throttling On Portable Gaming PCs?
Your portable gaming PC suddenly drops frames mid-battle. The fans scream at full speed. Your game feels sluggish and unresponsive. This is thermal throttling in action.
Thermal throttling happens when your CPU or GPU gets too hot. The processor automatically slows itself down to avoid damage. It is a built-in safety mechanism, but it kills your gaming performance fast.
Portable gaming PCs are especially vulnerable because they pack powerful hardware into tight, compact spaces. Heat builds up quickly with limited room for airflow.
The good news? Thermal throttling is fixable. Most causes come down to dust buildup, poor airflow, bad thermal paste contact, or blocked internal cables.
In this guide, you will learn exactly why thermal throttling happens on portable gaming PCs. You will also get clear, step-by-step solutions to stop it from ruining your sessions.
In a Nutshell
Thermal throttling is your device’s built-in safety response. It slows down your CPU or GPU to prevent damage from overheating.
Portable gaming PCs throttle more often than desktops because powerful components are packed into small, heat-trapping spaces.
Dust buildup is one of the most common causes. It blocks airflow and forces your hardware to run hotter than it should.
Poor airflow design, dried-out thermal paste, and blocked internal cables all make the problem worse over time.
Typical gaming temperatures sit between 70°C and 90°C. Hitting the upper limit regularly is a sign your cooling setup needs attention.
The fixes covered in this guide include cleaning your device, improving airflow, reapplying thermal paste, and adjusting fan settings.
What Is Thermal Throttling and Why Does It Happen on Portable Gaming PCs?
Thermal throttling is your device’s automatic safety feature. When your CPU or GPU temperature climbs too high, the system reduces clock speed to cool down. This protects your hardware from damage, but it also drops your gaming performance.
Why does this happen on portable gaming PCs? The answer is simple: space constraints. Gaming laptops pack powerful processors and graphics cards into tiny chassis. This creates a heat trap where warm air cannot escape efficiently.
Your portable gaming PC has limited cooling capacity compared to desktop computers. The fans are smaller. The heatsinks are compact. Air pathways are cramped. All of this means heat builds up faster and dissipates slower.
Common triggers for throttling include:
Dust accumulation blocks airflow through vents and fins. Your fans work harder but move less cool air. Dried thermal paste loses its heat transfer ability over time. Poor cable management inside the chassis restricts airflow. High ambient room temperatures give your cooler less cool air to work with.
Portable gaming PCs throttle more aggressively than desktops because they have less thermal headroom. A desktop might tolerate 95°C before throttling, but a laptop might start reducing performance at 85°C or lower.
The good news? Throttling is preventable and fixable. Most causes trace back to maintenance issues or design limitations you can address. Understanding why throttling happens is your first step toward fixing it.
Typical gaming temperatures range between 70°C and 90°C. If your device throttles below this range, your cooling system needs attention. If temperatures stay consistently high even at idle, you have a serious airflow or thermal paste problem.
How To Tell If Your Portable Gaming PC Is Thermal Throttling
Thermal throttling shows up as specific warning signs on your portable gaming PC. The most obvious indicator is sudden frame rate drops during gameplay. Your game runs smooth at 60 frames per second, then suddenly dips to 30 or 40 without any graphics setting changes.
You might also notice performance stuttering and lag spikes. Your PC feels sluggish even when running lighter tasks. This happens because your processor is deliberately slowing down to cool itself.
Check your CPU and GPU temperatures using system monitoring tools. Temperatures above 95°C strongly suggest active throttling. Many portable gaming PCs throttle around 85°C to 95°C depending on the model.
Listen for fan noise changes. Your cooling fans run at maximum speed when throttling occurs. If your fans suddenly become much louder during gaming, thermal throttling is likely happening.
Watch for performance inconsistency. Your portable PC performs well for 10 minutes, then performance drops. This pattern indicates the device is hitting temperature limits and reducing power to cool down.
Check if throttling happens during specific activities. Does it occur only during demanding games? Or does it happen during video editing and rendering too? This tells you whether your cooling system struggles with sustained heat loads.
Monitor your clock speeds if possible. Your processor runs at lower speeds than normal when throttling. A processor rated at 4.0 GHz might drop to 2.0 GHz or lower.
Feel your device’s exterior temperature. If the chassis feels extremely hot to touch, especially around vents and exhaust areas, throttling is likely active. These signs combined confirm thermal throttling is affecting your portable gaming PC’s performance.
How To Clean Dust Buildup and Restore Proper Airflow
Dust buildup is one of the easiest problems to fix on your portable gaming PC. Dust particles settle on heatsinks, fans, and air vents over time. This blocks airflow and traps heat inside your device. The good news? Regular cleaning restores proper airflow and reduces throttling significantly.
Start by powering down your device completely. Unplug it from the charger and let it cool for at least 15 minutes. Safety comes first when working with internal components.
Next, locate your air vents. Most portable gaming PCs have intake vents on the bottom or sides and exhaust vents near the back. Use compressed air to blow dust out of these vents. Hold the can upright and use short bursts. Blow from the inside outward when possible to push dust away from internal components.
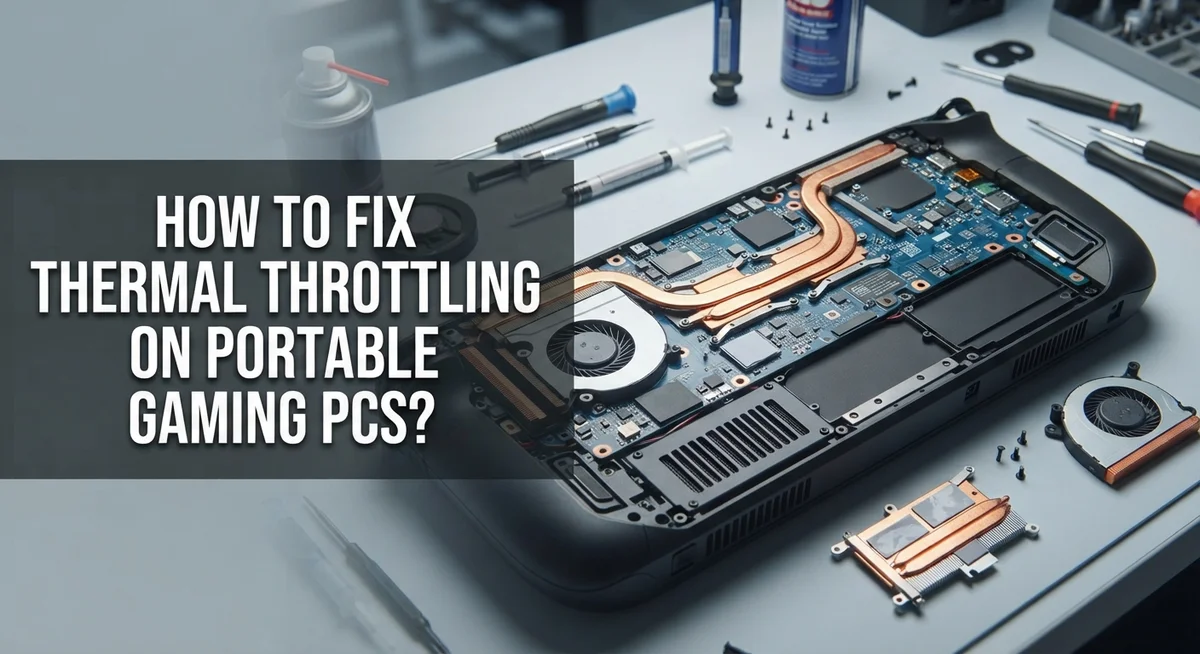
For stubborn dust, you may need to open your device’s chassis. Check your manual for instructions on removing panels safely. Once open, use compressed air to clean the heatsink fins directly. These fins collect dust easily and need attention. Blow gently to avoid damaging delicate components.
Pay special attention to your cooling fans. Dust on fan blades reduces their effectiveness. Clean around the fan housing carefully. Do not spin the fans by hand while cleaning, as this can damage them.
After cleaning, check that all cables inside are organized properly. Tangled cables block airflow paths. Arrange them along the edges of your chassis to create clear air channels.
Reassemble your device carefully. Power it on and monitor your temperatures during gaming. You should notice lower temperatures and reduced fan noise. Repeat this cleaning process every three to six months for optimal performance.
How To Reapply Thermal Paste and Check Heat Sink Contact
Reapplying thermal paste is one of the most effective ways to restore proper heat transfer between your CPU or GPU and the heat sink. Over time, thermal paste dries out and loses its effectiveness, which directly causes throttling.
Start by powering down your device completely and unplugging it. Let it cool for at least 30 minutes. This prevents burns and protects your components.
Next, carefully remove the heat sink from your processor. You’ll need to locate the mounting screws or clips holding it in place. Take photos before disassembling so you remember the exact configuration.
Use a soft cloth or coffee filter to remove the old thermal paste. Rubbing alcohol works well for stubborn residue. Wipe gently until the surface is completely clean. Don’t leave any dried paste behind, as it blocks heat transfer.
Before applying new paste, check if your heat sink base makes full contact with the processor. Place it flat on a clean surface. If you see light gaps between the base and the surface, your heat sink may be warped or damaged.
Apply a small amount of fresh thermal paste to the center of your processor. A rice grain or pea sized amount is typically enough. Avoid using too much, as excess paste actually reduces cooling performance.
Reinstall the heat sink carefully, ensuring even pressure across all mounting points. Tighten screws in a diagonal pattern to maintain uniform contact.
Monitor your temperatures after reassembly. You should see noticeable improvements within a few degrees. If temperatures remain high, your heat sink contact may still be imperfect, or you may need to replace the cooler entirely.
How To Optimize Internal Cable Management for Better Airflow
Internal cable management directly impacts how air moves through your portable gaming PC. Cables block airflow paths and create hot spots around your CPU and GPU. When cables scatter randomly inside your device, they trap warm air instead of letting it escape.
Start by identifying which cables matter most. Power cables, data cables, and fan connectors all take up space. Some cables run near your heat sink or graphics processor. These are your priority targets for reorganization.
Route cables along the edges of your device’s interior. Most portable gaming PCs have space along the sides or bottom where cables can sit without blocking central airflow. Use cable ties or velcro straps to bundle wires together neatly. Keep bundles away from intake fans and cooling fins.
Pay special attention to cables near your CPU cooler. Even a single cable draped across a heat sink reduces cooling efficiency. Move these cables to the outer perimeter of your device. Your fans need clear pathways to pull cool air inward and push hot air outward.
Check your cable routing before reassembling your device. Stand back and trace the airflow path from intake to exhaust. Cables should not interrupt this flow. If a cable crosses an airflow path, reposition it.
Good cable management takes just 15 to 20 minutes but delivers real temperature improvements. Many people see 3 to 5 degree temperature drops after tidying internal cables. This small effort prevents throttling and keeps your frame rates stable during long gaming sessions.
After organizing cables, monitor your temperatures during gameplay. You’ll likely notice your fans running quieter and your device staying cooler overall.
How To Adjust Fan Settings and Monitor Temperatures
Your portable gaming PC has built in temperature sensors and fan controls. Learning to adjust these settings helps you prevent thermal throttling before it starts. Most gaming PCs let you access fan settings through BIOS or dedicated software.
Start by checking your device’s manual to find the correct software or BIOS menu. Many manufacturers include fan control panels in their system software. Open this program and look for options labeled “fan speed,” “fan curve,” or “thermal settings.” These controls let you increase fan speed manually instead of waiting for automatic throttling.
Understanding fan curves matters here. A fan curve tells your cooler how fast to spin at different temperatures. Conservative curves keep fans quiet but may allow higher temperatures. Aggressive curves spin fans faster at lower temperatures, keeping your system cooler. You can often adjust this curve yourself by setting custom temperature thresholds.
Monitor your actual temperatures while gaming. Most control software displays real time CPU and GPU temperatures. Watch for patterns during gameplay. If temperatures hit 85°C or higher, your fan settings need adjustment. Increase fan speed incrementally and test again.
Balance performance with noise. Pushing fans to maximum speed creates loud noise but better cooling. Many users find a middle ground works best. Set your fan to increase speed gradually as temperatures rise rather than jumping to full speed immediately.
Check your settings monthly during gaming sessions. Seasonal temperature changes affect how hard your cooler needs to work. Summer months may require more aggressive fan curves than winter. Adjusting these settings takes just minutes but prevents performance loss from throttling.
Common Mistakes That Cause Thermal Throttling on Portable Gaming PCs
Thermal throttling happens when your portable gaming PC’s processor gets too hot and automatically slows down. Understanding what causes this problem helps you fix it faster.
Blocked airflow is the most common culprit. Many gamers place their laptops on soft surfaces like beds or couches. These surfaces block the intake vents underneath your device. Your cooler can’t pull in fresh air, so temperatures climb quickly. Always use your portable gaming PC on hard, flat surfaces instead.
Dust buildup inside your device reduces cooling efficiency significantly. Dust blocks air passages and coats your heat sink. This prevents heat from escaping properly. Check your vents every two weeks. If you see dust, clean it out gently with compressed air.
Poor heat sink contact causes major temperature problems. If your thermal paste dried out or your heat sink shifted, heat transfer suffers. Your processor stays hot even when your fan runs at full speed. This is why reapplying thermal paste often solves throttling issues.
Inadequate cooler capacity is another mistake people make. A cooler designed for light work won’t handle intense gaming sessions. If your device throttles even after cleaning and cable management, your cooler might be undersized for your needs.
Internal cables blocking airflow get overlooked frequently. Cables routed carelessly around your CPU cooler prevent air circulation. Reorganizing cables takes 15 minutes but delivers real results.
Finally, high room temperature contributes to throttling. Gaming in a hot room makes your device work harder. If your room stays above 75°F, your portable gaming PC struggles more. Lower your ambient temperature when possible.
These mistakes compound each other. Fix them one by one to restore normal performance and eliminate throttling completely.
Environmental and Ambient Factors That Worsen Thermal Throttling
Your portable gaming PC’s environment plays a huge role in thermal throttling. The air around your device directly affects how well your cooling system works.
Room temperature matters most. If your gaming space stays warm, your cooler has a harder job. Hot ambient air means your heat sink cannot cool your processor as effectively. A room temperature above 75°F (24°C) makes throttling more likely. Keep your gaming area cool and well ventilated whenever possible.
Humidity also impacts cooling performance. High moisture in the air reduces your cooler’s ability to transfer heat away from your components. Damp environments can even cause condensation inside your device over time. Try to game in dry conditions when you can.
Surface placement affects airflow significantly. Never place your portable gaming PC on soft surfaces like beds, couches, or pillows. These block the vents on the bottom and sides of your device. Hard, flat surfaces like desks or cooling pads allow proper air circulation underneath.
Direct sunlight exposure increases internal temperatures. Gaming near windows or in direct sun adds extra heat to your device. Move to shaded areas or close your curtains during gaming sessions.
Air vents around your gaming area matter too. If you game in a cluttered space, dust and debris float around more easily. These particles get sucked into your device’s intake vents and reduce cooling efficiency.
Proximity to other heat sources creates problems. Keep your portable gaming PC away from radiators, heaters, or other electronics that generate warmth. Even something as simple as a lamp nearby can raise ambient temperatures.
Monitor your room conditions during gameplay. Small environmental changes often prevent throttling before it starts.
Final Thoughts
Thermal throttling on portable gaming PCs is a real performance killer, but it is completely manageable with the right approach.
The core issue is always heat. When your CPU or GPU gets too hot, your device slows itself down to stay safe. That is not a flaw. That is a built-in protection system doing its job.
The good news is that most causes are fixable without special skills or tools.
Start with the basics. Check your airflow, clean out dust, and make sure your heat sink is making proper contact. These three steps alone solve the majority of throttling problems most gamers face.
Fan settings and temperature monitoring give you real-time control. Adjusting your fan curve lets you respond to heat before it becomes a problem. Watching your temperatures during gaming sessions helps you catch issues early.
Your environment matters just as much as your hardware setup. A cool, well-ventilated gaming space gives your cooler a much easier job. Keeping your device off soft surfaces and away from heat sources makes a noticeable difference.
Avoid the common mistakes that sneak up on people. Dust buildup, poor cable management, and dried thermal paste are quiet problems that grow worse over time.
Consistency is the real key here. Check your cooling setup regularly, not just when performance drops. Monthly maintenance keeps small issues from becoming serious ones.
Thermal throttling does not have to be a constant frustration. With proper cooling habits, smart placement, and regular upkeep, your portable gaming PC can deliver steady, strong performance every single session. You now have everything you need to take control of your temperatures for good.
Frequently Asked Questions
Can I prevent thermal throttling completely?
Yes, you can prevent it with proper cooling and airflow management. The key is staying ahead of heat buildup before your device triggers the safety mechanism. Regular maintenance and smart setup choices make a huge difference.
Keep your cooler functioning well. Clean dust filters every month. Ensure your heat sink sits flush against the processor. Check that your thermal paste hasn’t dried out. Good airflow management stops most throttling issues before they start.
Why does my portable gaming PC throttle at 70°C?
Your device has safety thresholds built in. Different models throttle at different temperatures. If throttling happens at 70°C, your cooler may not have enough capacity for your workload.
This temperature point is your warning sign. It tells you your cooling system needs help. You might need a better cooler, improved airflow, or lower ambient temperatures. Don’t ignore this signal because it prevents hardware damage.
What should I check first when throttling starts?
Start with cooler functionality. Make sure fans spin freely and make no odd noises. Check for airflow obstructions around vents and inside your case.
Look for dust buildup on filters and heat sinks. Blocked vents are the fastest way to trigger throttling. Remove any cables or objects restricting airflow. These simple checks solve most throttling problems quickly.
Does case design really affect performance?
Absolutely. Case ventilation directly impacts your frame rates and temperatures. A case with poor airflow forces your cooler to work harder. Better airflow means lower temperatures and no throttling.
High airflow case designs have balanced fan layouts. They pull cool air in and push hot air out efficiently. Your case design matters as much as your cooler itself.

Hi, I’m Simmy — the creator and writer behind ScaleMyPic.com. I’m a tech enthusiast who loves breaking down complex products into simple, honest reviews and guides. My goal? To help you make smarter tech decisions without the confusion. Got a question? Feel free to reach out!