How To Fix Joystick Deadzones On Lenovo Legion Go?
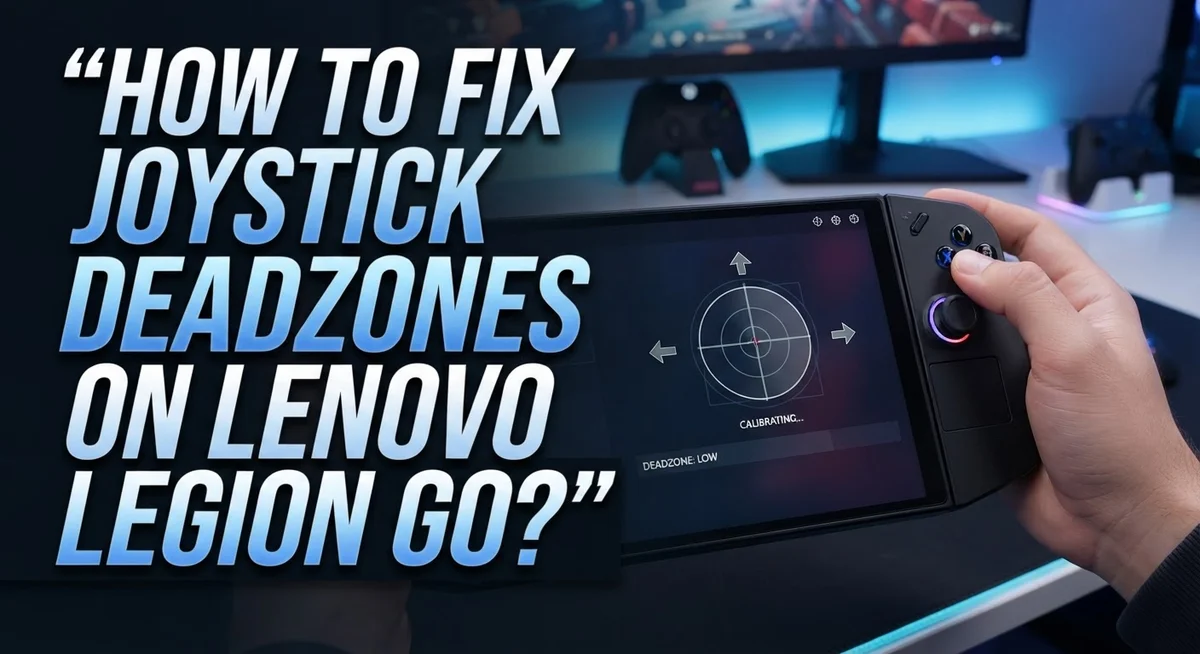
If your Lenovo Legion Go joystick feels sluggish or unresponsive near the center, you are likely dealing with a deadzone problem. This is one of the most common issues Legion Go users report, and it can seriously hurt your gaming precision.
A deadzone is the area around a joystick’s center where movement is not registered. The default deadzone on the Legion Go is often too large, making your character feel like it’s floating or delayed during gameplay.
The good news is that this is completely fixable without any special hardware. You can adjust settings directly through the built-in Legion Space app, recalibrate your sticks, and even fine-tune response curves to match your play style.
This guide walks you through every working method to fix joystick deadzones on your Legion Go. Let’s get your joysticks feeling sharp and accurate again.
In a Nutshell
- The default deadzone on the Legion Go is often too large, which makes joystick movement feel imprecise or delayed near the center.
- Open the Legion Space app, go to the Controllers tab, and find the Joystick Settings to access the deadzone sliders for both sticks.
- Setting your deadzone between 1% and 5% is generally the sweet spot for most players and games.
- Always recalibrate your sticks after making any adjustments. Skipping this step is one of the most common mistakes users make.
- Set your controller to gamepad mode before you start calibration. This ensures the calibration process works correctly.
- If the Legion Space app does not give you enough control, a BIOS update or third-party software like ReWASD can offer deeper customization. You can also lower the deadzone directly inside individual games when that option is available.
What Is a Joystick Deadzone and Why Does It Matter on the Legion Go?
A joystick deadzone is a small area around the center of your stick where inputs do not register. Think of it like a “dead zone” in the middle where you can move the stick slightly without anything happening in your game.
On the Lenovo Legion Go, this matters because a large deadzone makes your joystick feel sluggish and unresponsive. You push the stick forward, but your character does not move right away. This delay happens because the system ignores small movements near the center.
Why this matters for gaming becomes clear when you play precision games. In shooters, you need quick aim adjustments. In platformers, you need exact movement control. A big deadzone prevents both of these things from working smoothly.
The Legion Go often ships with a deadzone that is too large by default. This is why many users report that their joysticks feel imprecise straight out of the box. The good news is that you can shrink this deadzone to improve responsiveness.
A smaller deadzone means your stick reacts faster to your inputs. You get better control in games that demand accuracy. However, deadzones serve a real purpose too. They prevent stick drift, which is when your joystick registers movement even when you are not touching it.
Finding the right balance is key. Too large, and your stick feels dead. Too small, and stick drift becomes noticeable. Most players find that a deadzone between 1% and 5% works best.
Understanding this problem helps you fix it properly. You will know exactly what you are adjusting and why it matters for your gaming experience on the Legion Go.
How To Access Joystick Deadzone Settings in Legion Space
The Legion Space app is your main control center for joystick adjustments on the Legion Go. This software gives you direct access to deadzone settings without needing external tools.
Start by opening the Legion Space app on your device. Look for the Controllers tab at the top or in the main menu. This section contains all your input customization options. You will see various settings for both your left and right joysticks.
Once you are in the Controllers tab, find the Joystick Settings option. This is where the deadzone sliders live. You will see separate controls for your left stick and right stick. Each one can be adjusted independently based on your needs.
The deadzone slider typically shows a percentage value. You can drag it left to decrease the deadzone or right to increase it. Most players find that 1 to 5 percent works best for their gaming style. Start with a lower value and test it before making major changes.
An important step comes next: set your controller to gamepad mode before you adjust anything. This ensures the system recognizes your inputs correctly during calibration. You will find this option in the same settings menu.
After you move the deadzone slider to your preferred position, the app will usually prompt you to recalibrate. This process takes just a few seconds. Your joysticks will ask you to move them in specific directions. Follow the on screen instructions carefully.
The Legion Space interface is straightforward and user friendly. You do not need technical knowledge to navigate these settings. Take your time exploring the options. Small adjustments make a real difference in how your joysticks feel during gameplay.
Step-by-Step: Adjusting the Deadzone Slider for Each Stick
Start by opening the Legion Space app and navigating to the Controllers tab. Look for the Joystick Settings option. You will see two separate deadzone sliders, one for your left stick and one for your right stick.
Begin with your left stick. Move the deadzone slider to the left to decrease the dead zone value. Most players find that moving it between 1% and 5% works best. The slider shows you the exact percentage in real time, so you can see your changes immediately.
After adjusting the left stick, do the same for your right stick. Remember that each stick may need different settings based on how you hold the controller or your personal preference. Some players prefer identical settings on both sticks, while others adjust them separately.
Here is the critical part: After you finish adjusting both sliders, your controller must go through recalibration. The app will prompt you to recalibrate automatically. Do not skip this step. Without recalibration, your new deadzone settings will not work properly.
During recalibration, make sure your controller is in gamepad mode. This ensures the system reads your stick movements correctly. The recalibration process is quick and usually takes just a few seconds per stick.
Test your new settings in a game immediately after calibration. Move your sticks around in the game menu to feel the difference. If the deadzone still feels too large or too small, return to the Legion Space app and adjust the sliders again. You can repeat this process as many times as you need until you find your ideal setting.
How To Recalibrate Your Joysticks After Changing Deadzone Settings
After you adjust your deadzone settings in Legion Space, recalibration is the step that actually applies those changes. Skip this step and your new settings won’t work properly.
Here’s how to recalibrate correctly: First, make sure your controller is set to gamepad mode. This is essential because recalibration only works when your device recognizes the controller in the right format.
Open the Legion Space app again and go back to the Controllers tab. Look for a recalibrate button or option next to your joystick settings. The app will usually prompt you automatically after you adjust the deadzone sliders, but you can also trigger it manually if needed.
When you start recalibration, follow the on screen instructions carefully. You’ll typically need to move each stick in specific directions. Move your left stick slowly in a complete circle, then do the same with your right stick. Take your time with these movements because fast or jerky motions can produce inaccurate calibration data.
The recalibration process only takes a minute or two. Once it finishes, you’ll see a confirmation message. At this point, your new deadzone settings are officially active.
Test your joysticks immediately after recalibration completes. Launch a game that requires precise stick control and see how your new settings feel. If the response still seems off, you can repeat this entire process and adjust the deadzone values further.
Important note: Every time you change your deadzone settings, you must recalibrate. Your controller won’t recognize the new values without this final step. This recalibration process is quick and straightforward, so don’t skip it.
Fine-Tuning Response Curves for Better Joystick Precision
Response curves control how your joystick input translates into on screen movement. A good response curve makes your stick feel natural and precise. The Legion Go lets you adjust this curve to match your playing style.
Understanding response curves starts with knowing the basics. When you move your stick slightly, you want small movements on screen. When you push it fully, you want maximum speed or sensitivity. The curve determines this relationship between your physical stick movement and game response.
The Legion Space app offers preset curve options. Linear curves give consistent response at all stick positions. Aggressive curves provide faster response when you push the stick further. Sensitive curves react quickly even to small movements. Test each one in a real game to see which feels best.
Customize your curve per game type. Action games often benefit from aggressive curves for quick reactions. Strategy games work better with linear or sensitive curves for precise aiming. Racing games typically need responsive curves for sharp turning.
Fine tuning happens after you pick your base curve. Small adjustments to the curve shape can reduce overshooting or sluggish response. Make one change at a time and test it immediately. This prevents confusion about what actually helped.
Combine curve adjustments with your deadzone settings. A smaller deadzone works best with a linear curve. Larger deadzones pair well with aggressive curves. Your curve and deadzone should work together smoothly.
Test your settings in actual gameplay for at least five minutes. Quick menu testing doesn’t show real world performance. If something feels off, adjust one element and test again. Your ideal curve depends on personal preference and game type.
Using Third-Party Software To Customize Deadzones Further
Third party software gives you extra control beyond what the Legion Space app provides. These tools let you adjust deadzones with more precision and create custom profiles for different games.
ReWASD is a popular option that many players use to fine tune joystick settings. This software works alongside your existing controller setup. You can lower deadzones even further than the Legion Space app allows. The program also lets you save multiple profiles so you switch between games instantly.
Start by downloading the software and installing it on your Legion Go. Connect your controller and launch the application. Navigate to the joystick settings section. You’ll see sliders for both analog sticks. Adjust these values gradually and test in game after each change. Small adjustments make a big difference in how your stick responds.
Response curve customization becomes more powerful with third party tools. You can create curves that match your exact playing style. Aggressive curves help with fast paced action games. Smoother curves work better for precision shooting or strategy games.
Save your custom profile with a clear name like “Action Games” or “Precision Mode.” The software remembers these settings automatically. Switch profiles without restarting your games on most titles.
Test your new settings in actual gameplay for at least five minutes. This real world testing shows if your adjustments feel natural. If something feels off, return to the software and make small tweaks. You might need several rounds of testing to find your perfect settings.
Always keep your Legion Space app updated too. Both tools work together to give you the best possible joystick performance.
Common Mistakes To Avoid When Fixing Joystick Deadzones
Making mistakes when fixing joystick deadzones can actually make your problem worse. Here are the biggest errors you should avoid right now.
Skipping recalibration is the most common mistake. Many people adjust their deadzone settings and then jump straight into gaming. Your changes won’t actually work without recalibration. The Legion Go needs to learn your new settings through the calibration process. Always recalibrate after making any deadzone adjustment.
Not setting gamepad mode before calibration causes real issues. Your controller must be in gamepad mode for the calibration to work properly. If you skip this step, the recalibration won’t register correctly. Check your mode setting in the Legion Space app before you start.
Assuming all games support deadzone customization is another trap. Some games let you adjust deadzone settings in their own menus. Other games don’t offer this option at all. You can’t force a game to accept custom deadzone values if it doesn’t support them. Test each game individually to see what options are available.
Changing too many settings at once confuses the process. Adjust one deadzone slider, recalibrate, and test it. Then make your next change. This helps you understand which adjustments actually help your gameplay.
Forgetting to test your settings in real gameplay is wasteful. Your deadzone might feel perfect in menus but play differently during actual gaming. Spend at least five minutes testing in your favorite games. This shows you whether your adjustments truly solve the problem or need further tweaking.
Troubleshooting Persistent Deadzone Issues on the Legion Go
When your joystick feels unresponsive or drifts even after basic adjustments, you’re dealing with a persistent deadzone problem. This happens when the default settings don’t match your stick’s actual hardware response.
Start by opening the Legion Space app and navigating to the Controllers tab. Look for Joystick Settings and examine your current deadzone values. If they’re higher than 5%, this explains your responsiveness issues. Lower the deadzone slider gradually to 1–3% as a starting point.
After making changes, recalibration is essential. Make sure your controller is in gamepad mode first, then run the calibration tool. Skip this step and your adjustments won’t take effect properly. Many players make this mistake and think their changes didn’t work.
If the Legion Space app adjustments don’t solve the problem, consider updating your BIOS. Lenovo releases beta versions that sometimes fix hardware recognition issues. Check your device settings for available updates.
Test your new settings in an actual game for at least five minutes. Don’t just check the menu. Real gameplay shows you whether the deadzone works for your style.
If problems persist, try lowering the deadzone in individual game settings where available. Some games let you override system defaults. This gives you extra control over stick sensitivity.
Keep a record of what settings you’ve tried. Document which deadzone values worked for specific games. This helps you troubleshoot faster if issues return.
Persistent deadzone problems sometimes indicate hardware wear. If adjustments never improve responsiveness, your physical joystick may need service. Contact support with your troubleshooting notes to explain what you’ve already attempted.
Final Thoughts
Fixing joystick deadzones on your Lenovo Legion Go is very manageable once you understand the process. The key is patience and testing each change carefully.
Start with the Legion Space app. Go to the Controllers tab and adjust your deadzone sliders to somewhere between 1% and 5%. This small range gives you much better precision without causing drift.
Always recalibrate your sticks after every adjustment. Skipping this step is the most common reason fixes don’t work. Make sure your controller is in gamepad mode before you start calibration.
Response curves matter just as much as deadzone values. Adjust them based on the type of game you play. Fast action games need different settings than slow strategy titles.
If the Legion Space app alone doesn’t solve your problem, updating your BIOS can help. Beta BIOS versions have addressed joystick responsiveness issues that earlier firmware versions missed.
Third-party software gives you deeper control over your settings. Custom profiles let you switch between configurations quickly depending on what you’re playing.
Not every game supports in-game deadzone adjustments. Always check individual game settings to see if you can lower the deadzone there as well. Combining in-game settings with Legion Space settings gives you the best result.
Keep notes on what worked for each game. Documenting your settings saves time when you switch between titles or need to reset to defaults.
Consistent recalibration keeps your sticks performing well over time. Make it a habit, especially after long gaming sessions or when you notice any drift returning.
Frequently Asked Questions
Why does my joystick feel so unresponsive right out of the box?
Your Lenovo Legion Go comes with a default deadzone setting that’s larger than most players prefer. The deadzone is the area around the center where your stick doesn’t register movement. A bigger deadzone means you need to push the stick further before the game responds.
This is a safety feature to prevent accidental inputs. However, it reduces precision for many games. You can shrink this deadzone using the Legion Space app to improve responsiveness immediately.
What’s the ideal deadzone percentage for gaming?
Most players find 1 to 5 percent works best for their sticks. This range gives you precision without making the stick too sensitive. Start at 3 percent and adjust up or down based on how your games feel.
Different games may need different settings. A fast action game might need 2 percent, while a slower strategy game could use 4 percent. Test each setting in actual gameplay for at least a few minutes before changing again.
Do I need to recalibrate after every deadzone change?
Yes, you should always recalibrate after adjusting your deadzone settings. Recalibration tells your Legion Go to recognize the new deadzone range. Without recalibration, your changes won’t work properly.
The process is quick. Just access the Controllers tab in Legion Space and select recalibrate. Make sure your controller is in gamepad mode before you start.
Can I adjust deadzone settings inside individual games?
Some games let you adjust deadzone in their settings menu. Not all games support this feature, though. Check your game’s control options first.
If a game doesn’t offer deadzone adjustment, use the Legion Space app settings instead. You can also try lowering the deadzone value in Legion Space and testing it in that specific game.

Hi, I’m Simmy — the creator and writer behind ScaleMyPic.com. I’m a tech enthusiast who loves breaking down complex products into simple, honest reviews and guides. My goal? To help you make smarter tech decisions without the confusion. Got a question? Feel free to reach out!