How To Fix Windows 11 Blue Screen During High-Framerate Gaming?
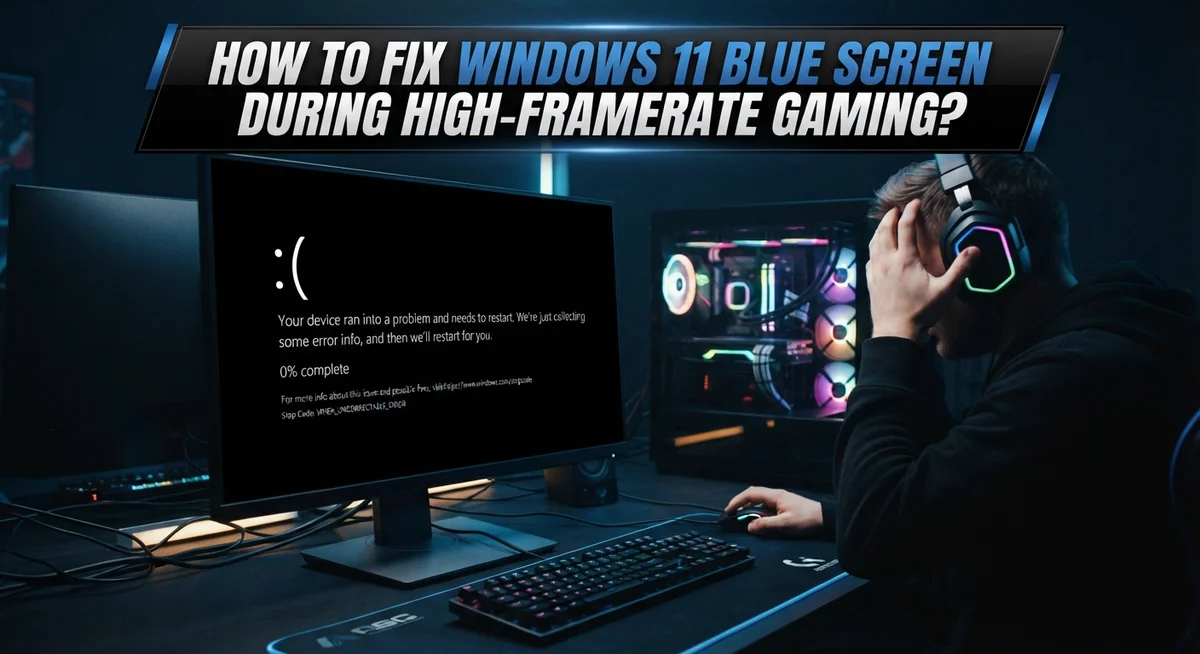
Nothing kills your gaming session faster than a sudden blue screen. You are in the middle of an intense match, your framerate is high, and then your screen turns blue. Windows 11 shuts everything down without warning.
This problem happens to many gamers. High framerate gaming pushes your system hard. It puts stress on your graphics card, drivers, and memory. When something is not stable, Windows 11 crashes to protect itself.
The good news is that you can fix this issue. Most blue screen problems during gaming come from driver conflicts or hardware stress. They are not random and they are not permanent.
This article will show you exactly how to solve this problem. We will walk through checking your graphics drivers first. Then we will cover safe mode diagnostics and disk scans.
In a Nutshell
- Update your graphics drivers first. Most crashes during gaming link back to outdated or broken Nvidia or AMD drivers.
- Use DDU for a clean sweep. This tool removes old driver files completely, so nothing corrupted stays behind.
- Always restart your PC after any driver change. Skipping this step often causes the same error to return.
- Check the error code on the blue screen. This code tells you exactly what part of your system is failing.
- Boot into Safe Mode to test your system. This step helps you see if the problem is software or hardware based.
- Run a disk scan and try System Restore. These tools fix corrupted files and roll your PC back to a stable point.
Why High-Framerate Gaming Triggers Blue Screens
High framerates push your computer harder than normal gameplay. When you run games at 144 fps, 240 fps, or even higher, your GPU and CPU work at maximum capacity. This intense workload exposes problems that stay hidden during regular use.
Driver conflicts are the main culprit. Your graphics driver must communicate perfectly with Windows 11 at high speeds. If your driver has bugs or conflicts with your system, the blue screen appears under stress. Older drivers especially struggle with modern games and high framerates.
Hardware limitations also trigger crashes. Your power supply might not deliver enough stable power when your GPU runs at full speed. Overheating components reduce their performance and cause system failures. RAM issues become obvious only when your system demands maximum memory bandwidth during intense gaming.
Windows 11 itself can have compatibility issues. Some system updates introduce bugs that affect gaming stability. These problems often appear only when your system hits peak performance levels. Regular users never notice because they do not push their hardware this hard.
Overclocking amplifies these problems. If you have overclocked your GPU or CPU, high framerates become risky. Overclocking reduces stability margins, and the extra stress from high framerates pushes your system past its safe limits.
Background processes steal resources. Windows updates, antivirus scans, or cloud sync services running in the background consume CPU and disk access. During high framerate gaming, these interruptions cause stutters and crashes. Your system simply cannot handle everything at once.
Thermal throttling kicks in. When components get too hot, they slow down automatically to cool off. This sudden performance drop confuses your graphics driver, leading to a crash. High framerates generate more heat than lower framerates, so thermal issues become more likely.
Understanding these causes helps you fix the problem effectively. Each cause requires a different solution approach.
Reading BSOD Error Codes and Memory Dump Files
When your screen turns blue, Windows leaves behind clues. These clues help you find the real problem. You need to learn how to read them.
The error code appears on the blue screen itself. Look for a code like “DRIVER_IRQL_NOT_LESS_OR_EQUAL” or “VIDEO_TDR_FAILURE”. Write this code down. This specific name tells you exactly what went wrong.
A QR code also appears on the screen. You can scan this with your phone. It takes you to Microsoft’s support pages with detailed information about that exact error. This saves time compared to searching manually.
Memory dump files contain the deepest information. Windows saves these files automatically when a crash happens. You find them in your system drive under “Windows” then “Minidump”. Each file has a name like “Mini010124-01.dmp”.
To read these dump files, you need special tools. Windows Debugger is the standard choice. It shows you exactly which driver or program caused the crash. The information looks technical, but the key details stand out. Look for driver names like “nvidia.sys” or “amd.sys”. These point directly to graphics driver problems.
Check your Event Viewer too. Press Windows key plus R, type “eventvwr.msc”, and press Enter. Look in “Windows Logs” then “System”. Find entries marked “Error” near the time your crash happened. These logs often mention the problematic driver or hardware component.
Start a notebook and write down every code and error message you see. When you search online for these specific codes, you get accurate solutions instead of generic advice. Different error codes need different fixes. One code might mean driver corruption. Another might indicate power supply failure. The code itself guides your next step.
Step-by-Step: Fully Removing and Reinstalling Graphics Drivers with DDU
Display Driver Uninstaller, commonly called DDU, is a utility that removes graphics drivers completely from your Windows 11 system. Unlike standard uninstall methods, DDU eliminates leftover driver files that cause conflicts and crashes during high framerate gaming.
Why complete removal matters is simple: partial driver removal leaves corrupted files behind. These hidden files confuse Windows 11 when you install a new driver version. The result is often the blue screen crash you’re trying to fix.
Start by downloading DDU from its official source. Save the file to your desktop for easy access. Next, restart your computer and boot into Safe Mode with Networking. This prevents Windows from loading unnecessary services that might interfere with driver removal.
Open DDU once Safe Mode loads. The program displays your current graphics driver clearly. Select your GPU manufacturer (Nvidia, AMD, or Intel). Then click the removal option. DDU will scan your system and delete every trace of the old driver. This includes registry entries, leftover files, and configuration data.
The removal process takes several minutes. Let it finish completely without interrupting. Once DDU finishes, restart your computer again. This restart is essential because Windows needs to refresh its driver database.
After restarting, your system runs without any graphics driver temporarily. Your screen may look different or display lower resolution. This is normal and expected.
Now you’re ready to install a fresh, clean graphics driver. Download the latest version directly from your GPU manufacturer’s website. Run the installer and follow the on screen prompts. Choose a clean installation option if available.
Complete the installation and restart one final time. Your system now has a fresh driver with no conflicting files. High framerate gaming should run more smoothly without blue screen crashes. If problems persist, the issue likely involves hardware rather than drivers.
Running Disk and Memory Diagnostics from Command Prompt
Windows 11 stores important system information when a crash happens. You can access diagnostic tools through Command Prompt to check your disk and memory health. These tools help you find hardware problems that cause blue screens during gaming.
Open Command Prompt as administrator to start the process. Right click the Start button and select “Command Prompt (Admin)” or “Windows Terminal (Admin)”. You need administrator access to run system scans.
Type the disk check command to scan your storage drive. This command examines your hard drive or SSD for errors and bad sectors. The scan takes time to complete, sometimes 15 to 30 minutes depending on your drive size. Windows might ask you to restart and run the scan before the system boots. Allow this process to finish completely.
Next, run the memory diagnostic tool from Command Prompt. This utility tests your RAM to find corruption or failing modules. Memory problems often cause random crashes during high performance tasks like gaming. The diagnostic runs during startup and provides detailed results afterward.
Check the results carefully after each scan finishes. Command Prompt displays any errors it found. Write down the error codes and descriptions you see. These details help you understand what’s failing in your system.
If the disk scan finds errors, Windows attempts to repair them automatically. If memory diagnostics show problems, you likely have a faulty RAM stick. Bad memory requires hardware replacement since software cannot fix physical damage.
Run these diagnostics even if you suspect driver issues. Hardware problems often hide behind software problems. A failing drive or RAM module creates blue screens that look like driver conflicts. These command line tools give you concrete answers about your system’s physical health. Once you confirm your hardware is healthy, you can focus on driver and software solutions with confidence.
Using Safe Mode to Isolate Software vs Hardware Causes
Safe Mode is a stripped down version of Windows that loads only essential system files. It stops most programs and drivers from running automatically. This makes Safe Mode perfect for figuring out whether your blue screen problem comes from software or hardware.
When you boot into Safe Mode, third party software cannot interfere. Background applications stay dormant. Only Microsoft’s core drivers load. If your gaming crashes stop happening in Safe Mode, a software conflict is likely the culprit. If the blue screen still appears, your hardware probably needs attention.
To enter Safe Mode on Windows 11, restart your computer and press F8 repeatedly during startup. You can also hold Shift while clicking restart from the power menu. Windows will show you boot options. Select Safe Mode from the list. Your screen will look different with lower resolution and fewer colors. This is normal.
Once in Safe Mode, avoid launching any games. Instead, check your system for obvious problems. Open Event Viewer to see if error messages appear without gaming stress. Run the memory diagnostic tool. These tests reveal hardware issues clearly.
If Safe Mode runs smoothly for several hours, your graphics driver or gaming software is likely causing the crashes. Return to normal Windows mode and focus on driver updates or reinstalls. Use DDU to completely remove your graphics driver, then install a fresh version from the manufacturer’s website.
If the blue screen still happens in Safe Mode, your RAM or storage drive may be failing. Hardware replacement becomes necessary. You might also have a motherboard issue. In these cases, consider professional repair services.
Safe Mode acts as your diagnostic checkpoint. It separates software problems from hardware problems quickly. This saves you time and prevents unnecessary troubleshooting steps.
Applying System Restore and Advanced Recovery Options
System Restore lets you roll back Windows to a previous date when your gaming sessions ran without crashes. This method works well because it undoes recent system changes that may have caused the blue screen errors.
To access System Restore, open the Start menu and search for “System Restore.” Click “Create a restore point” from the search results. A window appears showing your system protection settings. Select the “System Restore” button to begin the recovery process.
Windows displays a list of available restore points. Each point shows the date and time it was created. Look for a restore point from before your blue screen problems started. Choose that point and click “Next” to proceed.
The system asks you to confirm your choice. Review the details carefully to ensure you’re selecting the correct restore point. Click “Finish” to start the restoration process. Your computer restarts automatically during this operation.
The restoration takes several minutes to complete. Do not turn off your computer during this time. Your system returns to its previous state once finished. All programs and settings revert to that earlier date.
If System Restore doesn’t resolve your gaming crashes, try Advanced Recovery Options. Restart your computer and press F8 repeatedly during startup. Select “Troubleshoot” from the boot menu. Choose “Advanced options” to access additional recovery tools.
Within Advanced options, you’ll find “Reset this PC.” This option removes all installed programs and files, then reinstalls Windows 11. Use this as a last resort when other methods fail.
Before resetting, back up your important files to an external drive. The reset process erases everything on your system drive. After reset completes, your gaming performance may improve significantly if corrupted system files caused the crashes.
Test your gaming stability after each recovery step. Monitor frame rates and watch for blue screen errors during extended gameplay sessions.
Common Mistakes That Cause Repeated Blue Screens
Many gamers experience repeated blue screens because they make preventable mistakes during troubleshooting. Understanding these errors helps you fix the problem faster.
Partial driver removal is the biggest culprit. Many people uninstall their graphics driver through the standard Windows method, then install a new version immediately. This leaves corrupted files behind that cause conflicts. These leftover files interfere with your new driver installation, creating the same crashes you’re trying to fix. You must remove every trace of the old driver before installing anything new.
Skipping the restart after driver updates causes another common issue. Your system needs time to fully apply driver changes. Without restarting, Windows hasn’t properly registered the new driver files. Your graphics card still uses old driver code, leading to instability during high framerate gaming. Always restart your computer after any driver installation or update.
Ignoring error codes is a third major mistake. When your blue screen appears, it displays specific error information and sometimes a QR code. Many gamers ignore this data and restart without noting the details. These codes tell you exactly what failed. Different errors point to different solutions. Driver problems, RAM issues, and storage failures all show different codes. Taking a photo of the error saves valuable troubleshooting time.
Not testing your system properly before declaring victory is another trap. After making changes, people resume gaming immediately. Real stability testing requires running your system under stress for several hours. Crashes often take time to appear. Jumping back to gaming too quickly means you’ll experience the same blue screen again after an hour of play.
Finally, many people skip diagnostic steps entirely. They assume the problem is one thing without checking. Running disk scans and memory diagnostics takes time but reveals whether your issue stems from hardware failure or software conflicts. This information changes your entire troubleshooting approach.
Final Thoughts
Blue screens during intense gaming sessions feel frustrating. But most causes trace back to a few clear problems. Graphics drivers remain the top suspect in nearly every case.
Your approach matters more than speed. Rushing through fixes often creates new problems. Take time to test each solution properly before moving to the next step.
Start with the simplest fix first. Update your graphics driver and restart your PC completely. Many crashes disappear after this single step.
If crashes continue, dig deeper into your system. Check your error codes carefully. These codes point directly to the failing component or driver.
Run a disk scan to catch corrupted files early. Windows includes built in tools that find and repair many storage issues automatically.
Testing matters just as much as fixing. Play games for extended periods after each change. A quick five minute session won’t reveal hidden problems.
Some crashes point to hardware failure rather than software glitches. If your PC crashes even outside games, your hardware likely needs attention. Consider professional diagnosis for persistent hardware issues.
Patience pays off during this process. Each troubleshooting step eliminates specific causes. Skipping steps often means repeating the same crashes later.
Keep records of what you’ve tried. Note which fixes worked and which didn’t. This information helps if problems return later.
Your gaming setup deserves stability. High framerates push your system hard, but they shouldn’t cause constant crashes. A properly configured PC handles demanding games smoothly.
Most Windows 11 blue screen issues during gaming have clear solutions. Work through each step methodically. Your system will reward this careful approach with stable, crash free gaming sessions.
Don’t give up after one failed attempt. Some fixes take multiple tries or combinations of solutions. Your persistence will pay off with a stable gaming experience.
Frequently Asked Questions
Why do I get blue screens only during high framerate gaming?
High framerates push your system harder than normal use. Your GPU, CPU, and memory work at maximum capacity. This stress exposes hidden problems like outdated drivers, overheating, or failing hardware. Low framerate gaming doesn’t trigger these issues because the load stays lighter.
Driver conflicts are the most common cause. Your graphics driver may not support the extreme performance demands. Update your driver first before investigating other causes.
What error code should I look for?
Windows displays a specific error code on the blue screen. Common gaming related codes include DRIVER_IRQL_NOT_LESS_OR_EQUAL and VIDEO_TDR_TIMEOUT_DETECTED. These codes tell you exactly what failed.
Write down the error code before your PC restarts. You can also check the memory dump files in Windows for detailed information. These files live in your System32 folder and contain crash data.
Should I use Safe Mode to test my system?
Yes. Safe Mode loads only essential Windows files and drivers. If your PC runs stable in Safe Mode without blue screens, the problem is software related, not hardware.
Boot into Safe Mode by restarting and holding Shift during startup. Try some light gaming or stress testing. Hardware problems will still appear in Safe Mode, so this test pinpoints whether drivers or components are failing.
Can a disk scan prevent blue screens?
Corrupted system files can trigger crashes during intense gaming sessions. Run a disk scan using Command Prompt to find and repair these files. Type “sfc /scannow” to start the scan.
The scan takes 15 to 20 minutes. Let it complete fully. Fixing corrupted files often stops blue screens immediately.

Hi, I’m Simmy — the creator and writer behind ScaleMyPic.com. I’m a tech enthusiast who loves breaking down complex products into simple, honest reviews and guides. My goal? To help you make smarter tech decisions without the confusion. Got a question? Feel free to reach out!