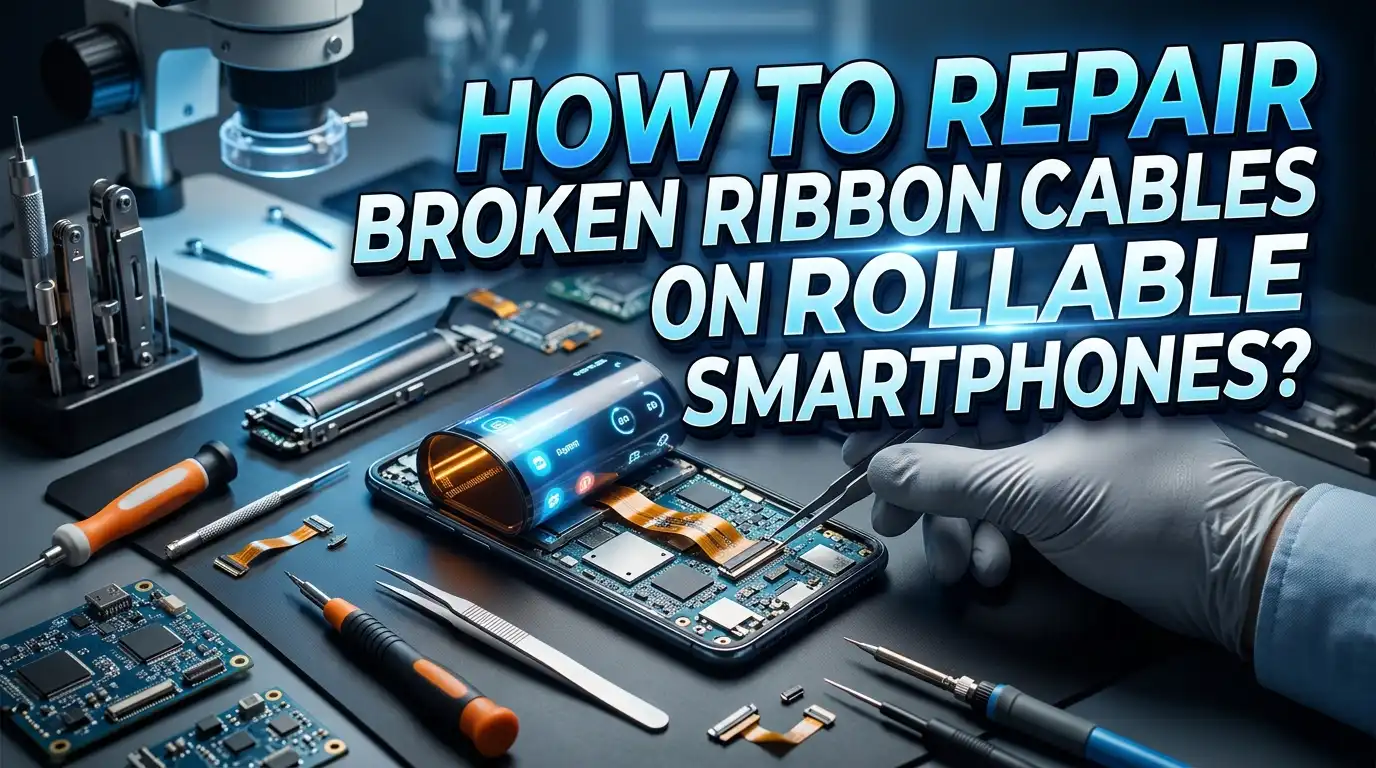
How To Repair Broken Ribbon Cables On Rollable Smartphones?
Rollable smartphones represent the next generation of mobile technology. These devices use flexible OLED displays that extend and retract around an internal mechanism. At the core of this system sit delicate ribbon cables, also called flex cables or FPC (Flexible Printed Circuit) connectors. These thin, flat cables connect the display, touch sensors, cameras, and motherboard inside the phone.
The problem? These ribbon cables break. The constant rolling and unrolling motion creates stress on the cable traces. A single crack in a ribbon cable can cause a flickering screen, dead touch zones, or a completely blank display.
This guide walks you through the full process of diagnosing, repairing, and preventing ribbon cable failures on rollable smartphones. You will learn exactly what tools you need, how to open your device safely, and how to restore broken traces.
In a Nutshell
- Identify the symptoms first. A broken ribbon cable can cause screen flickering, partial display blackout, unresponsive touch areas, random restarts, or camera failure. The symptom you see tells you which cable is damaged.
- Gather the right tools before opening your phone. You will need a precision screwdriver set, plastic spudgers, tweezers, a soldering iron with a fine tip, flux, solder paste, isopropyl alcohol, a magnifying glass or microscope, and UV curable solder mask.
- ESD protection is critical. Static electricity can destroy sensitive components inside your phone. Always wear an anti static wrist strap and work on a grounded ESD mat.
- Replacement is sometimes better than repair. If the cable has multiple breaks or the damage sits near the connector, sourcing a replacement flex cable may be more reliable than soldering repairs.
- Professional help is an option. If you lack micro soldering experience, a trained technician with a microscope and proper tools can complete this repair with higher success rates. There is no shame in choosing professional service.
- Prevention matters. After the repair, proper handling and maintenance of the rolling mechanism will help you avoid future cable failures.
Understanding Ribbon Cables In Rollable Smartphones
Ribbon cables in rollable smartphones are different from those in standard phones. A traditional smartphone has a rigid frame, and the flex cables inside rarely bend after assembly. A rollable phone changes that equation entirely. The display extends and retracts around a cylindrical mechanism, and the ribbon cable must follow that movement every single time.
These cables are made from thin polyimide film with copper traces etched onto the surface. The traces carry electrical signals between the flexible display panel and the main logic board. In rollable devices, the cable passes through or around the rolling mechanism. This creates a dynamic bending zone where the cable curves repeatedly during normal use.
Manufacturers design these cables to handle thousands of cycles. Samsung, OPPO, and other companies use specialized materials and reinforced cable designs. However, no material is immune to fatigue. Over months or years of use, the copper traces develop tiny cracks. These micro fractures grow with continued use until the electrical connection breaks completely.
The ribbon cable in a rollable phone also carries high speed data signals for the display. Protocols like MIPI DSI have strict impedance requirements. Even a partial crack that does not fully sever a trace can degrade the signal enough to cause visual artifacts on screen. Understanding this helps you recognize early warning signs before total failure occurs.
Common Signs Your Ribbon Cable Is Broken
Knowing the symptoms of a broken ribbon cable helps you act before the problem gets worse. The most obvious sign is display failure. You might see colored lines running across the screen, sections of the display going dark, or the entire screen turning black while the phone still vibrates and makes sounds.
Touch failure is another major indicator. If certain areas of the screen stop responding to your finger, or if touch input becomes erratic and unpredictable, the digitizer ribbon cable may have a break. This often shows up in the area of the screen that sits closest to the rolling mechanism.
Random reboots triggered by rolling the display are a strong signal of cable damage. If your phone restarts every time you extend or retract the screen, the cable is likely making and losing contact as it bends. This intermittent connection creates power fluctuations that force the phone to restart.
Camera malfunctions can also point to ribbon cable issues. If your rear or front camera shows a black screen, refuses to focus, or causes the camera app to crash, check the camera flex cable. In rollable phones, camera cables may route near the rolling area and experience secondary stress. Screen flickering that appears only during the rolling motion is perhaps the most telling symptom. This behavior confirms that the physical movement of the mechanism directly affects the cable connection.
Tools And Materials You Will Need
A successful ribbon cable repair requires specific tools. Do not attempt this repair with household items. You risk causing additional damage to the phone or injuring yourself. Here is everything you should have on your workbench before you begin.
You need a precision screwdriver set that includes pentalobe, Phillips, and Torx bits in small sizes. Most rollable smartphones use tiny proprietary screws. A set of plastic spudgers and pry tools is essential for separating the phone housing without scratching or cracking components. Metal tools can short circuit exposed components and should be avoided.
For the actual cable repair, you need a soldering iron with a fine conical tip rated for temperatures between 300 and 350 degrees Celsius. Leaded solder in thin gauge (0.3mm or smaller) flows more easily at lower temperatures and reduces the risk of heat damage to the polyimide substrate. Solder flux in a pen or syringe form helps the solder adhere to the exposed copper traces.
A microscope or high magnification loupe is practically mandatory. The traces on a smartphone ribbon cable are often less than 0.3mm wide. You cannot see them clearly with the naked eye. A USB digital microscope works well and costs relatively little.
Additional supplies include isopropyl alcohol (99% concentration) for cleaning, a fiberglass scratch pen for exposing copper traces, UV curable solder mask for insulating your repairs, a UV light for curing the mask, Kapton tape for protecting nearby components, and an ESD wrist strap with a grounding mat to prevent static damage.
How To Safely Open A Rollable Smartphone
Opening a rollable smartphone requires patience and precision. These devices have more moving parts than standard phones, and the internal layout is more complex. Rushing this step can break additional cables or damage the rolling mechanism.
Start by powering off the phone completely. Remove any SIM card tray. Place the phone face down on a soft, clean surface. Most rollable phones have a rear panel held in place by adhesive and clips. Apply gentle heat to the edges using a heat gun or hair dryer set to low temperature (around 60 to 70 degrees Celsius). This softens the adhesive without damaging internal components.
Insert a thin plastic pick or suction cup at the seam between the back panel and the frame. Work slowly around the edges, separating the adhesive bond. Never insert the tool more than 2 to 3 millimeters deep to avoid puncturing the battery or cutting internal cables.
Once the back panel is off, you will see a metal shield or bracket covering the internal components. Remove the screws holding this shield in place and set them aside in an organized manner. Photograph each step with another camera or phone so you have a visual reference for reassembly.
Locate the ribbon cables carefully. In rollable phones, the main display cable often runs along a specific channel near the rolling cylinder. Note how the cable is routed and how it connects to the motherboard. Most connectors use a small latch or ZIF (Zero Insertion Force) clip. Lift the latch gently with a plastic spudger before pulling the cable free.
Diagnosing The Exact Break Point
Before you attempt a repair, you need to find exactly where the cable is broken. A visual inspection under magnification is your first step. Place the ribbon cable under your microscope and look for visible cracks, tears, discoloration, or burned spots along the trace lines.
The break often occurs at the point of maximum bend. In rollable smartphones, this spot sits where the cable curves around the rolling mechanism. You may see a clean crack across one or more traces, or you might notice the polyimide substrate itself has started to delaminate or peel at that location.
If the break is not visible, use a multimeter set to continuity mode. Touch one probe to a trace at one end of the cable and the other probe to the same trace at the opposite end. A continuous beep means the trace is intact. Silence means the trace is broken somewhere along its length. Test every trace individually.
For intermittent faults where the cable works sometimes and fails other times, gently flex the cable while testing continuity. The multimeter will beep and go silent as you bend through the damaged zone. This pinpoints the exact location of the micro crack.
Mark the damaged area with a tiny dot of permanent marker on the cable substrate next to the broken traces. This mark guides your repair work and ensures you address every affected trace. Some cables carry dozens of traces, so be thorough. Missing even one broken trace can leave you with a partially functional display after reassembly.
Preparing The Cable For Repair
Preparation is the most important phase of the actual repair work. Clean the damaged area first. Use isopropyl alcohol and a lint free wipe to remove any dust, grease, or residue from the ribbon cable surface. Contaminants interfere with solder adhesion and can cause your repair to fail.
Secure the cable to a flat, stable surface. Use double sided tape to stick the cable flat on a piece of glass or a PCB holder. This prevents the cable from moving while you work under the microscope. Any unintended movement at this scale can destroy adjacent traces.
Now you need to expose the copper traces on both sides of the break. The traces sit under a protective layer of polyimide or solder mask material. Use a fiberglass scratch pen to gently abrade the surface coating and reveal the bare copper underneath. Work carefully and check under the microscope frequently. You want to expose approximately 1 to 2 millimeters of copper on each side of the break.
Stagger your exposure points. Do not expose all traces at the same distance from the break. Offset the exposed copper from one trace to the next. This reduces the risk of solder bridges between adjacent traces during the repair. If trace one is exposed 1mm from the break, expose trace two at 1.5mm, trace three at 1mm again, and so on.
Once the copper is exposed, apply a thin layer of flux to the bare copper surfaces. The flux will help the solder flow cleanly onto the traces when you begin soldering. Inspect your preparation work under the microscope one final time before proceeding. Confirm that every broken trace has exposed copper on both sides and that no adjacent traces are accidentally connected.
Soldering Broken Traces Back Together
This is the core repair step. You will bridge each broken trace with a thin jumper wire or conductive material. There are several methods, and the best choice depends on your skill level and the tools available to you.
The most reliable method uses enameled copper jumper wire in 0.1mm or thinner gauge. Cut a small piece of wire slightly longer than the gap between the two exposed copper pads on the broken trace. Tin both exposed pads with a tiny amount of solder. Then place the jumper wire across the gap and solder each end to its respective pad.
Work under the microscope at all times. The traces on a smartphone flex cable are extremely close together. A solder bridge between two adjacent traces can cause a short circuit that damages the display driver IC or other components. Use the finest tip on your soldering iron and keep contact time under two seconds per joint. Excessive heat damages the polyimide substrate.
An alternative method uses silver conductive paste or conductive adhesive. Apply a thin line of conductive paste across the break on each trace. This method requires less skill than soldering but produces a less durable connection. It works best for cables that will not experience significant flexing after repair.
After soldering or applying conductive paste to every broken trace, clean the area thoroughly with isopropyl alcohol. Remove all flux residue. Then test each repaired trace with your multimeter in continuity mode. Every trace should show a solid connection. If any trace still fails, rework that specific joint before moving on.
Applying Protective Coating After Repair
Your repair is electrically complete, but it is mechanically vulnerable. Bare solder joints and exposed copper will oxidize, short circuit, or break again without protection. Applying a protective coating is a required final step.
UV curable solder mask is the best option for this application. It comes in a liquid form that you apply with a fine brush, toothpick, or syringe. Spread a thin, even layer over the entire repaired area. Cover all exposed copper, solder joints, and jumper wires. Make sure the coating does not create lumps or thick spots that could interfere with the cable’s ability to flex.
Cure the solder mask by exposing it to a UV light source for the time specified by the manufacturer. Most UV masks cure fully in 30 to 60 seconds under a 365nm UV LED. The cured mask forms a hard, insulating layer that protects your repair from oxidation and accidental shorts.
For additional mechanical strength, apply a small piece of Kapton tape over the cured solder mask. Kapton tape is thin, heat resistant, and flexible. It adds a second layer of protection without significantly increasing the cable’s thickness or stiffness.
Do not use regular adhesive tape, electrical tape, or hot glue. These materials are too thick, produce residue, or do not withstand the temperatures inside a smartphone. Kapton tape and UV solder mask are the only materials appropriate for this application. After coating and curing, gently flex the cable by hand and check that the repaired area moves smoothly without cracking the protective layer.
Reassembling The Rollable Smartphone
With the repair complete and tested, you can now put the phone back together. Follow your disassembly photos in reverse order. This ensures every cable, bracket, and screw returns to its correct position.
Reconnect the repaired ribbon cable to its motherboard connector first. Slide the cable into the ZIF connector gently and press the latch down until it clicks. Do not force the cable. If it does not slide in smoothly, check the alignment and try again. A misaligned cable will not make proper contact and can bend the connector pins.
Route the cable through the same channel it occupied originally. Pay special attention to the area near the rolling mechanism. The cable must sit in its designated path to avoid pinching or excessive bending during operation. If the cable is even slightly out of position, it may catch on the rolling cylinder and tear again.
Reattach all metal shields and brackets. Tighten screws to their original torque. Do not overtighten, as this can crack the bracket or strip the screw threads in the phone’s frame.
Before sealing the back panel, power on the phone and test every function. Check the display for proper color, brightness, and touch response. Extend and retract the rolling display several times while watching for flickering or artifacts. Test the cameras, speakers, and charging port. If everything works correctly, apply new adhesive to the back panel and press it into place. Clamp the phone gently or use rubber bands to hold the panel while the adhesive sets.
When To Replace Instead Of Repair
Not every broken ribbon cable can be repaired. There are situations where replacement is the smarter and safer choice. Knowing the difference saves you time and prevents frustration.
If the cable has multiple breaks spread across different sections, repair becomes impractical. Each repair adds thickness and stiffness to the cable. A cable with three or more repaired zones will not flex properly through the rolling mechanism and will likely fail again within weeks.
Damage at or near the connector end of the cable is another situation where replacement wins. The connector area has very fine pitch traces packed tightly together. Soldering repairs in this zone carries a high risk of bridging adjacent traces. A replacement cable with an intact connector provides a clean, reliable connection.
If you cannot source a replacement cable from a parts supplier, consider contacting the phone manufacturer’s service center. Some manufacturers sell flex cables as service parts. Others may offer out of warranty repair at a fixed price that includes the cable and labor.
Water damage combined with cable failure also favors replacement. Corrosion from liquid exposure weakens the copper traces along the entire cable length. You might repair the visible break, only to have another section fail days later because the corrosion has spread. A new cable eliminates this hidden risk entirely.
Preventing Future Ribbon Cable Damage
Prevention is always cheaper and easier than repair. You can significantly extend the life of your rollable phone’s ribbon cables with a few simple habits.
Avoid extending and retracting the display more than necessary. Each cycle adds stress to the cable. If you do not need the extra screen space, keep the display in its default position. Treat the rolling mechanism like a precision instrument, because that is exactly what it is.
Keep your phone away from extreme temperatures. Cold temperatures make the polyimide substrate and copper traces more brittle. Heat causes the materials to expand and can accelerate fatigue at bend points. Do not leave your phone in a hot car or use it outdoors in freezing conditions for extended periods.
Use a protective case designed for your specific rollable phone model. A good case absorbs impact from drops and prevents the rolling mechanism from deploying accidentally in a bag or pocket. Accidental deployments add unnecessary stress cycles to the ribbon cable.
Keep the rolling mechanism clean. Dust and debris can enter the mechanism gap and create friction points. This friction puts additional strain on the cable as it moves. Use compressed air periodically to blow out any particles from the mechanism area. Do not use liquids for this cleaning, as moisture can seep into the cable connector zone and cause corrosion.
If you notice any early warning signs like occasional screen flicker during rolling, intermittent touch issues, or brief display blackouts, address them immediately. Early intervention often means a simple re seating of the cable connector rather than a full soldering repair.
Should You DIY Or Hire A Professional
The honest answer depends on your experience level. Ribbon cable repair on a rollable smartphone is an advanced repair task. It requires micro soldering skills, proper magnification equipment, and steady hands.
If you have experience with electronics repair and own a microscope and fine tip soldering station, a DIY repair is feasible. The materials cost very little compared to professional service fees. You also gain valuable experience and the satisfaction of fixing your own device.
If you have never soldered before, this is not the project to learn on. A rollable smartphone contains components worth hundreds of dollars. One slip of the soldering iron can destroy the display panel, damage the motherboard, or burn through the battery. Practice on scrap electronics first. Find old ribbon cables from broken devices and practice exposing traces, tinning pads, and soldering jumper wires.
Professional repair technicians have access to specialized equipment including binocular microscopes, hot air rework stations, and ultrasonic cleaners. They can complete the repair faster and with higher reliability than most home repairs. Many independent repair shops now work on foldable and rollable devices as these phones become more common.
Get a quote from two or three repair shops before deciding. Compare the cost of professional repair against the value of your phone and the risk of DIY failure. For a phone worth over $1,000, spending $100 to $300 on professional repair often makes better financial sense than risking total device loss from an unsuccessful home repair.
Frequently Asked Questions
Can I use regular tape to fix a broken ribbon cable temporarily?
Regular tape does not conduct electricity, so it cannot restore a broken electrical connection. It can hold a cracked cable in position temporarily if the traces are not fully severed. However, this is a very short term fix. The adhesive from regular tape can leave residue that interferes with a proper repair later. Kapton tape is a better option for temporary stabilization because it leaves minimal residue and withstands heat.
How long does a ribbon cable repair last on a rollable phone?
A properly executed soldering repair with UV solder mask protection can last several months to over a year. The lifespan depends on how often you use the rolling mechanism and how well the repaired area was reinforced. Conductive paste repairs tend to be less durable and may last only a few weeks under regular rolling stress. Replacement cables generally provide the longest lasting solution.
Is it possible to buy replacement ribbon cables for rollable phones?
Replacement cables for some models are available through third party parts suppliers and online marketplaces. Availability depends on the phone model and how long it has been on the market. Newer or less popular models may have limited parts availability. Contact the manufacturer’s service department to ask about official replacement parts if third party options do not exist.
What causes ribbon cables to break in rollable smartphones?
The primary cause is mechanical fatigue from repeated bending. Every time the display extends or retracts, the ribbon cable flexes around the rolling mechanism. Over thousands of cycles, the copper traces develop micro cracks that grow into full breaks. Secondary causes include drops, water exposure, extreme temperatures, and manufacturing defects in the cable material.
Can a broken ribbon cable damage other phone components?
Yes. A partially broken cable can create intermittent short circuits that send incorrect voltage or data signals to the display driver, touch controller, or main processor. These erratic signals can potentially damage sensitive ICs over time. If you notice symptoms of a failing ribbon cable, stop using the rolling function and seek repair promptly to prevent secondary damage to other components.
Do I need a microscope for ribbon cable repair?
A microscope or strong magnification tool is practically required. The copper traces on smartphone ribbon cables are often 0.2 to 0.3mm wide with gaps of similar size between them. Working without magnification at this scale almost guarantees solder bridges or missed traces. A USB digital microscope with 10x to 50x magnification provides enough detail for most ribbon cable repairs and is affordable for home use.
Hi, I’m Simmy — the creator and writer behind ScaleMyPic.com. I’m a tech enthusiast who loves breaking down complex products into simple, honest reviews and guides. My goal? To help you make smarter tech decisions without the confusion. Got a question? Feel free to reach out!